Integrating HelpNinja (Content)
![]() Updated
Updated
To integrate HelpNinja as a content provider (to enable you to make its content available within your HelpShelf widget) you will need to set the Site ID and API Key.
To locate these details, you will need to login to your HelpNinja account. To do this, head to https://dashboard.helpninja.com/#/login. Once logged in, follow the instructions below to locate your Site ID and API Key.
Locating your Site ID
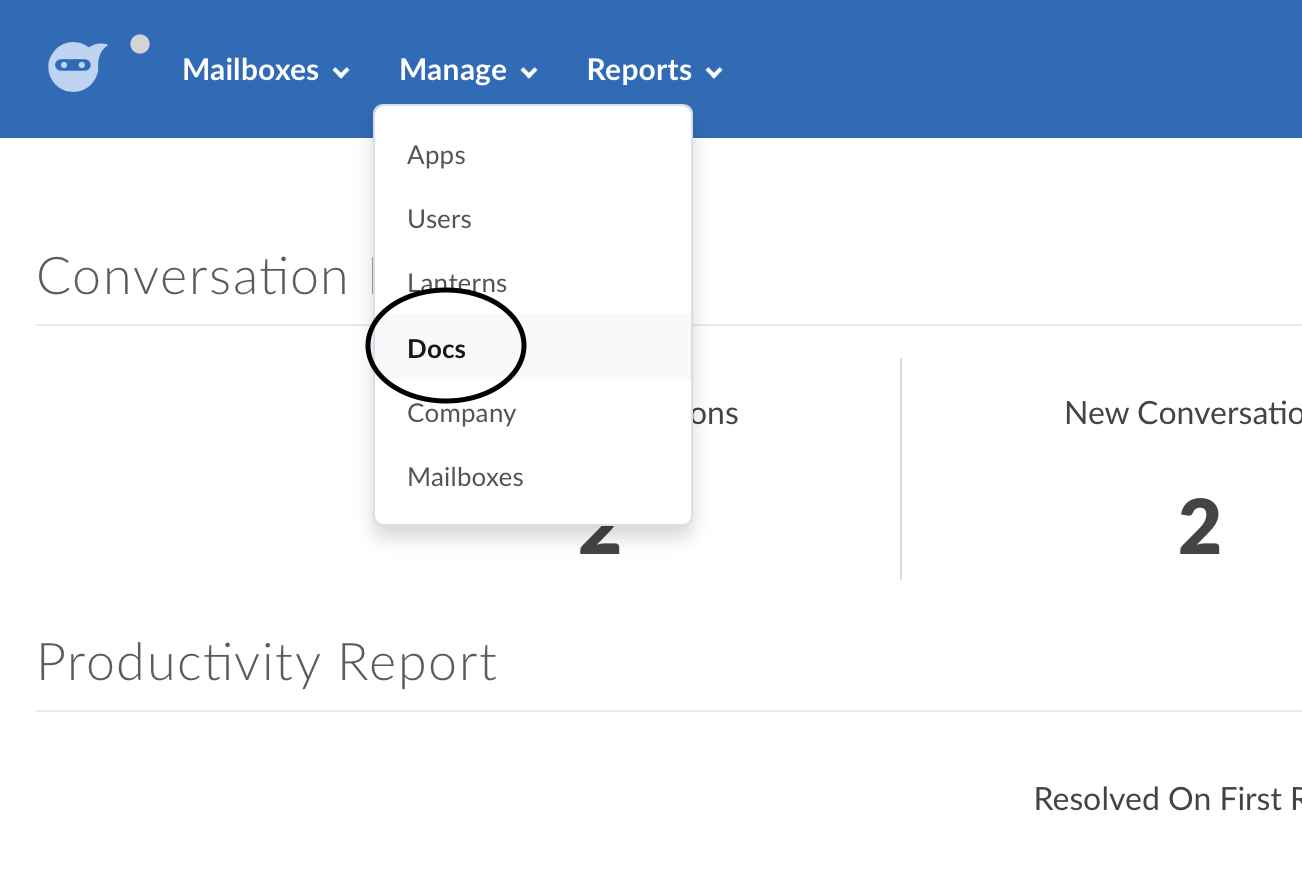
Once logged in, press the Manage menu item from the top header and then select the Docs option, as shown below.
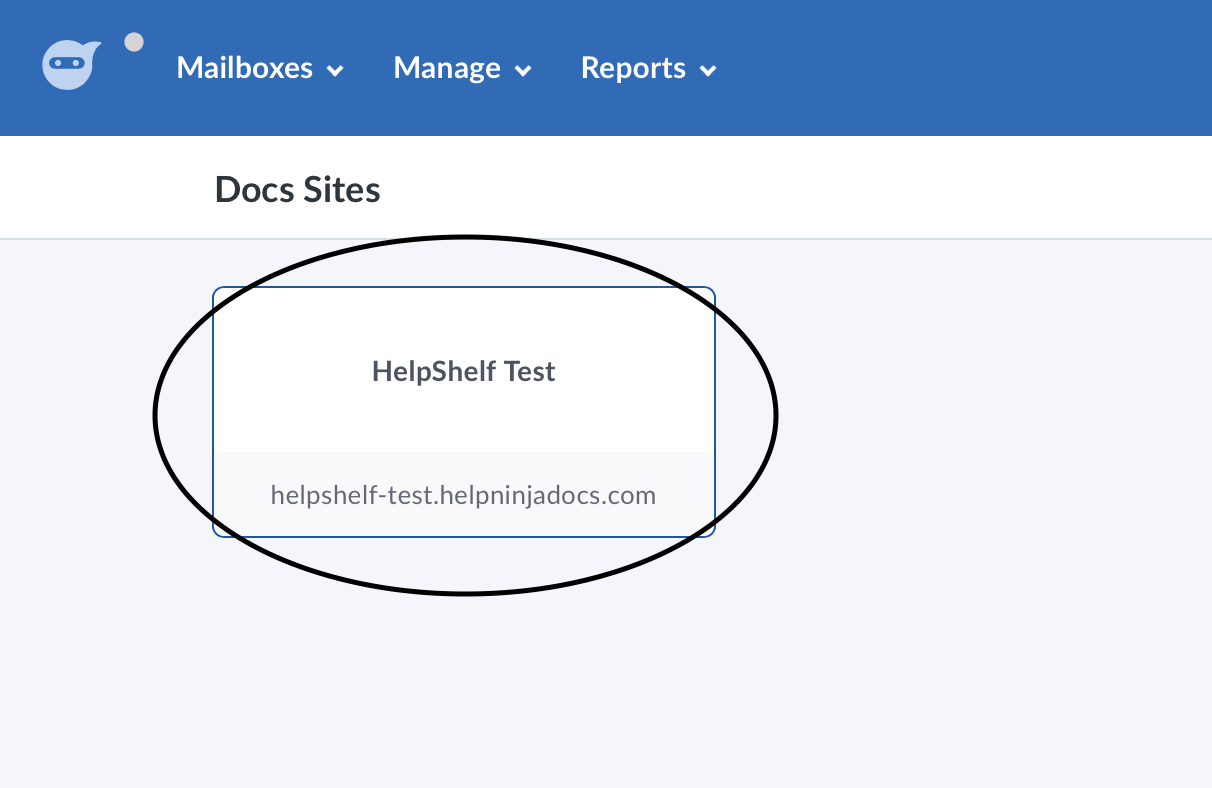
On the next screen you will see your existing doc sites listed. If you don't see any listed, you will need to first create one by pressing the "New Site" button in the header. In our case, we have a test site setup, so we can select that one - as shown below.
You will now be taken into the Site you selected. The Site ID can be located by looking at the URL. We've circled the part in the screenshot below that refers to the Site ID.

So in our case, our Site ID is 5ca8caa273782c19218fcfc0. Copy this code and enter that into your HelpShelf setup form in the Site ID field.
Locating your API Key
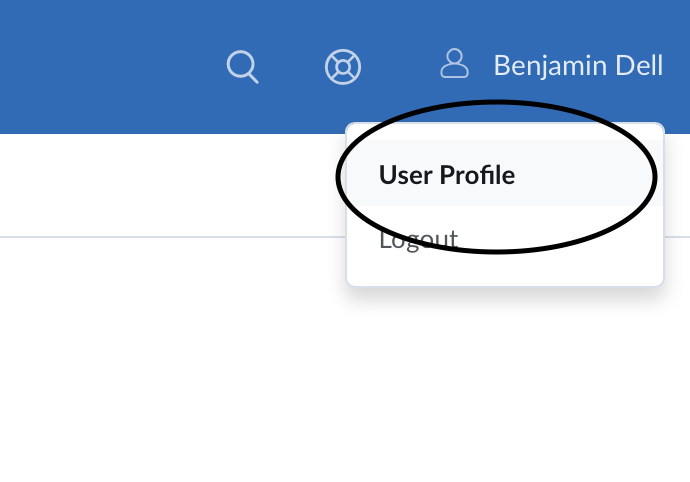
Once logged into your HelpNinja dashboard, head over to the User Profile section. This can be accessed by pressing the far right dropdown menu in the header, which should be your name. In this dropdown, select the User Profile option. This is shown in the screenshot below:
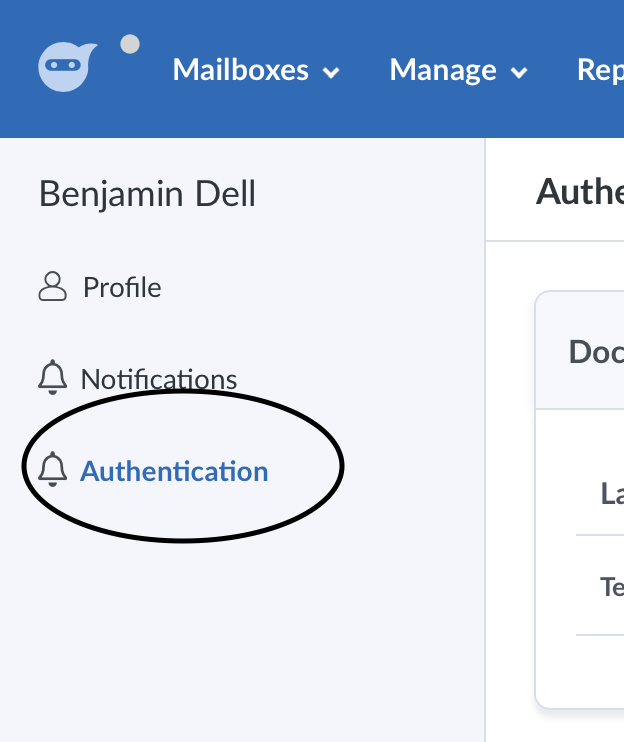
Next, select the Authentication menu item from the left sidebar. As per below:
As a final step, you will now either need to select an existing API Key, or create a new one. Both of these options are highlighted in the screenshot below.
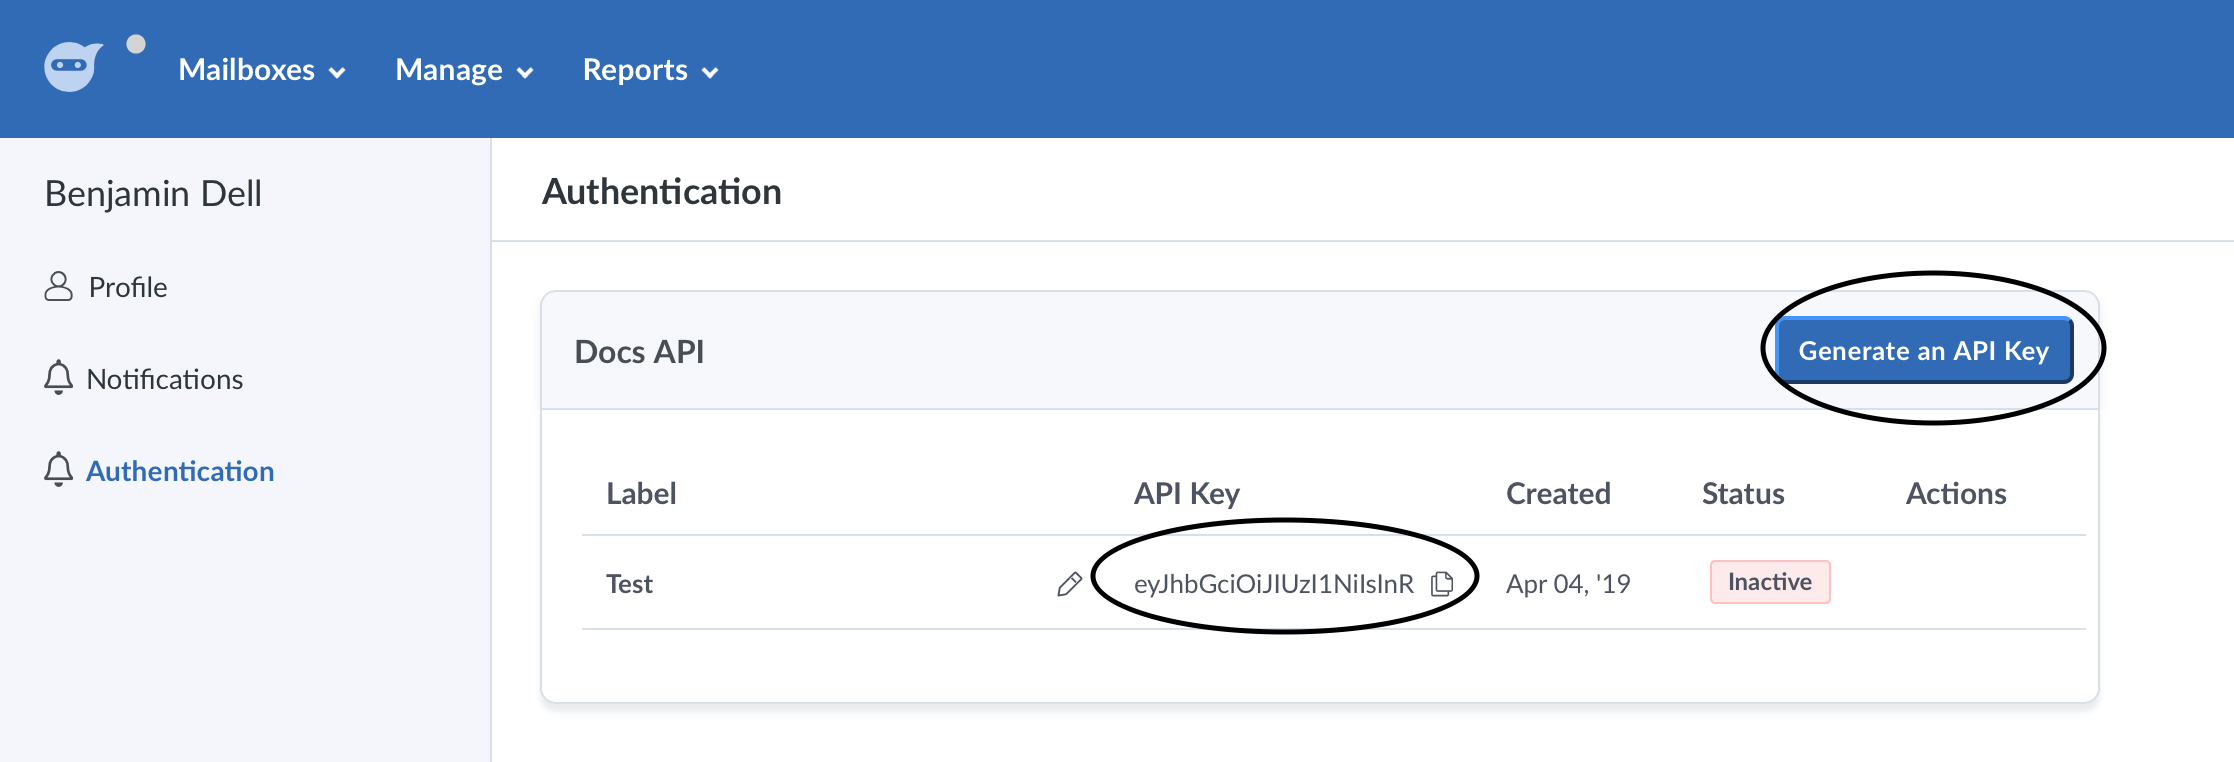
Clicking the API Key text, will copy it to your clipboard. Copy this and enter it into your HelpShelf setup form in the API Key field.
You should now be setup :)